Send Form
🍏 Only available on the Apple Messages for Business channel.
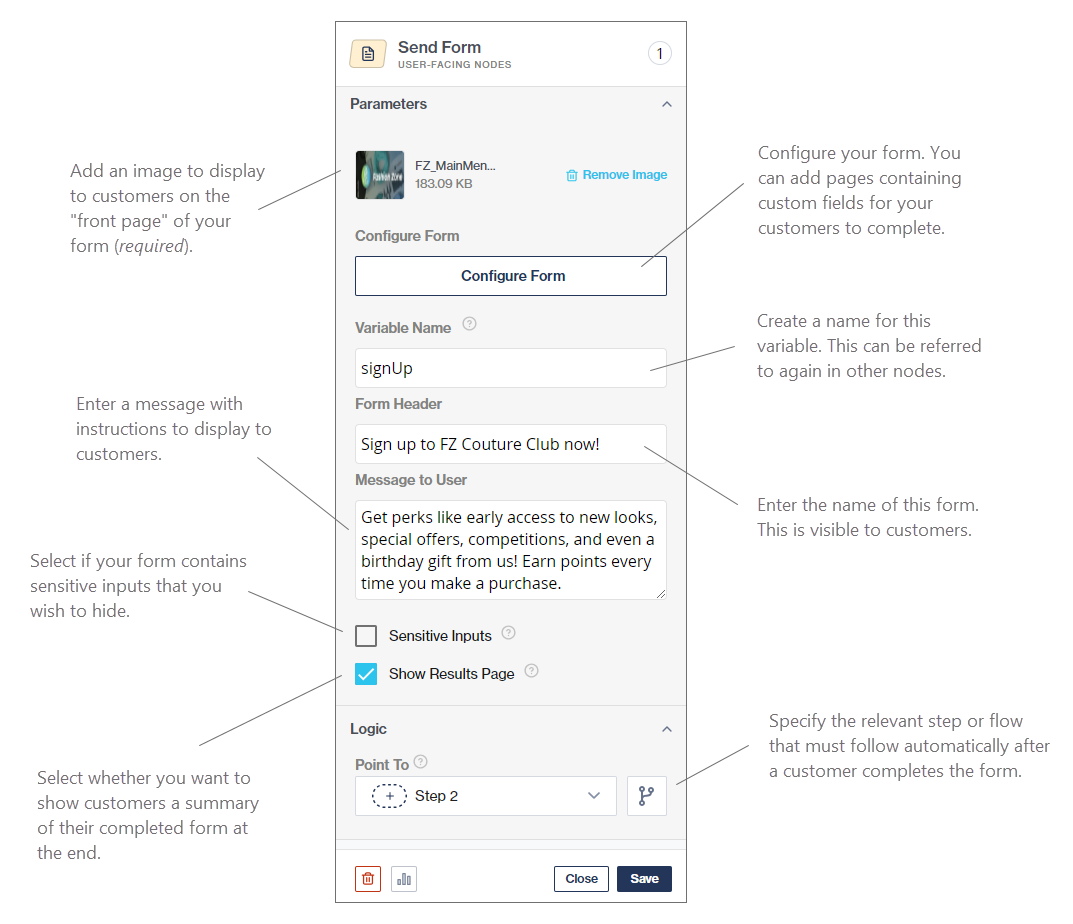
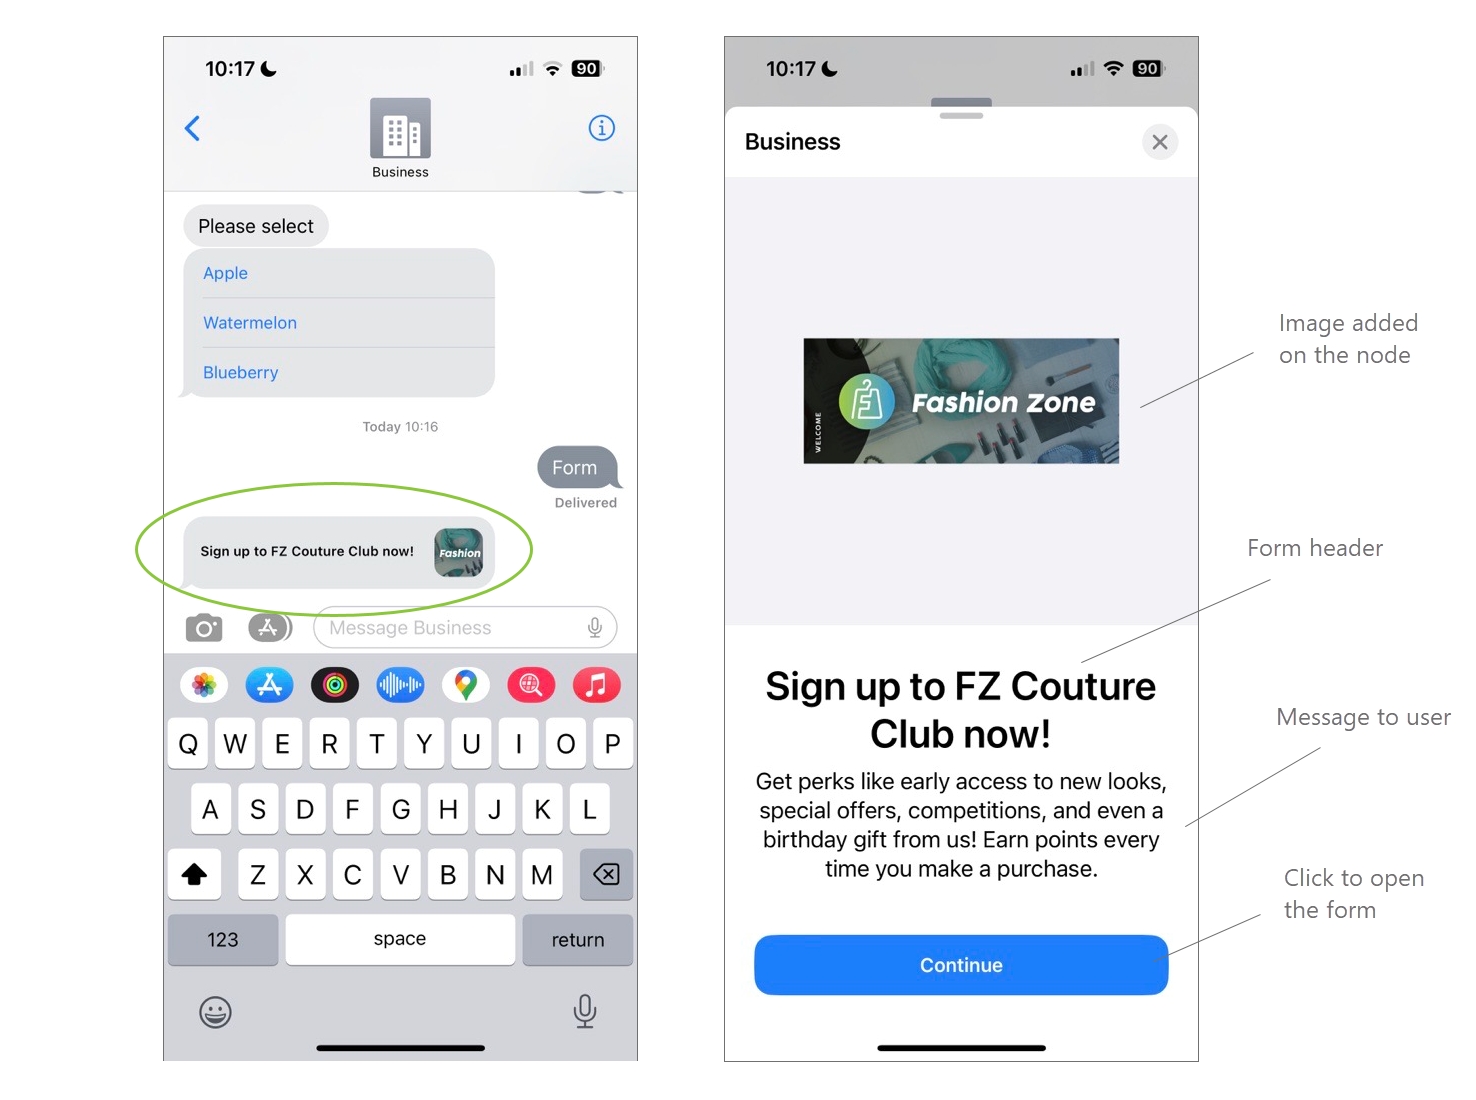
With the Send Form node, you can create rich, multipage interactive forms for customers to complete on their mobile devices.
Configure the node
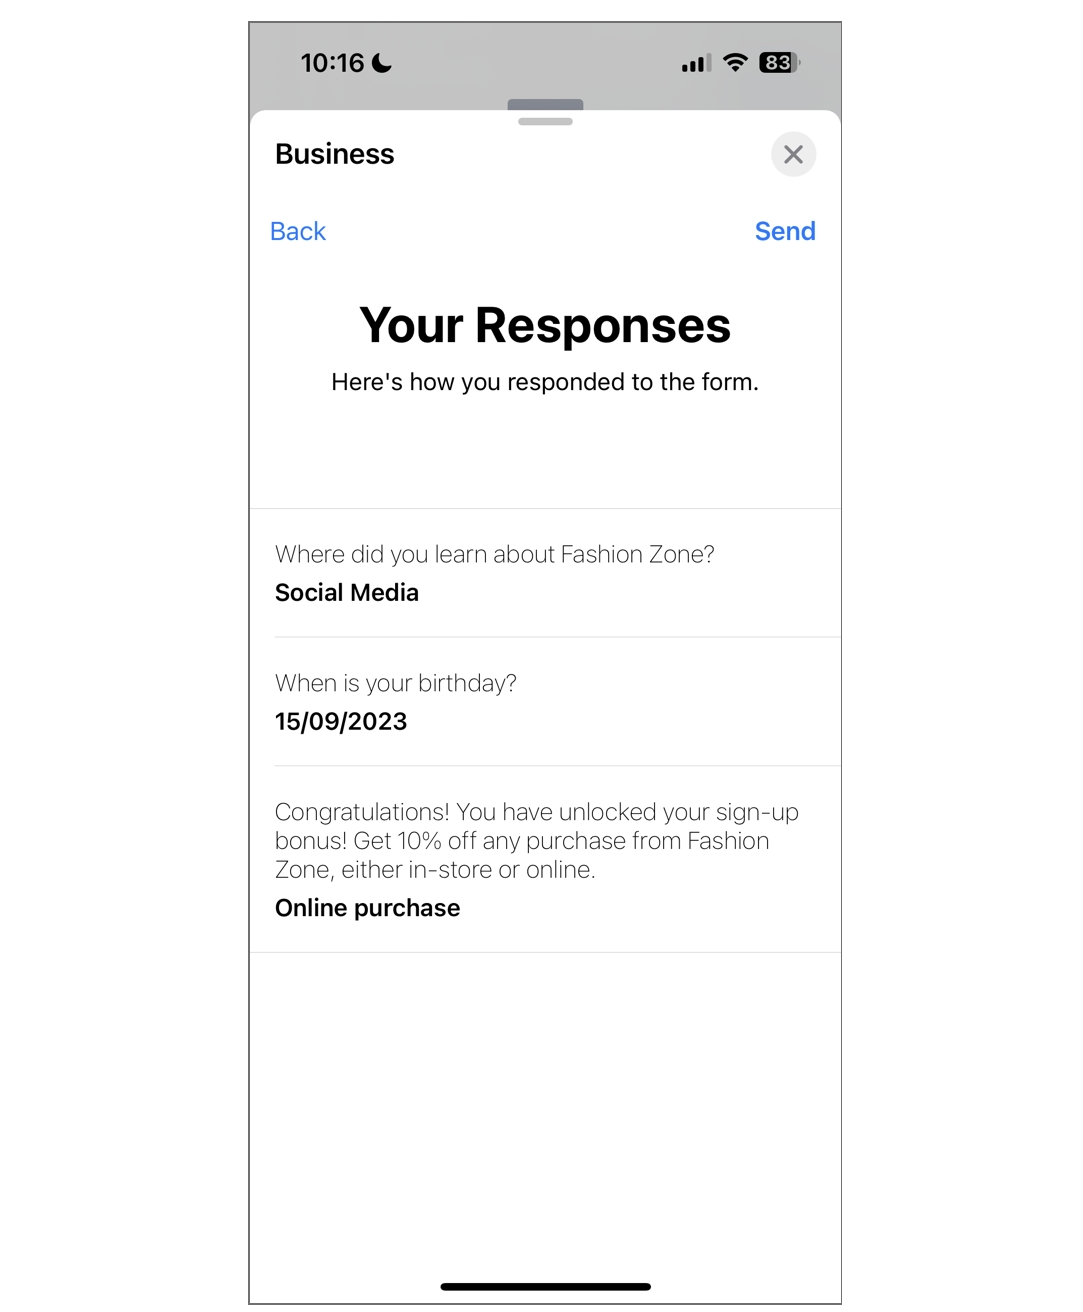
If you've selected the "Show Results Page" option when configuring the node (see above), a summary of the customer's responses is shown to them upon completing the form. They have the option to send the form if they are happy with their responses, or to step back and amend their answers if they wish.
Configure the form
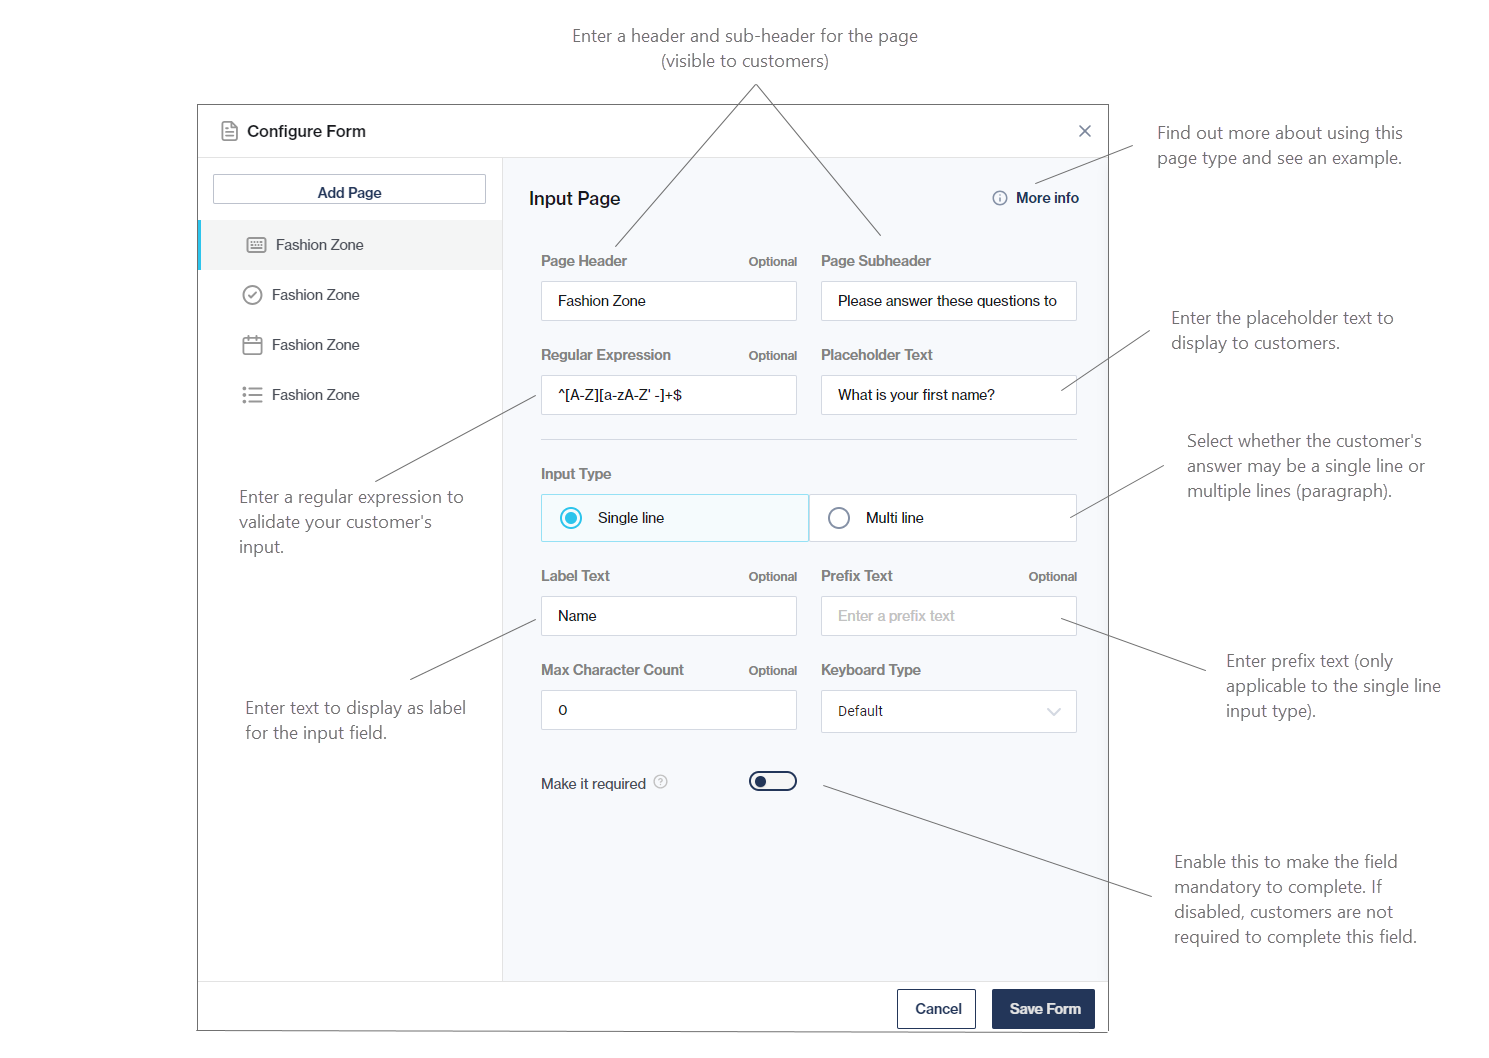
When configuring the node, click on Configure Form (as shown above).
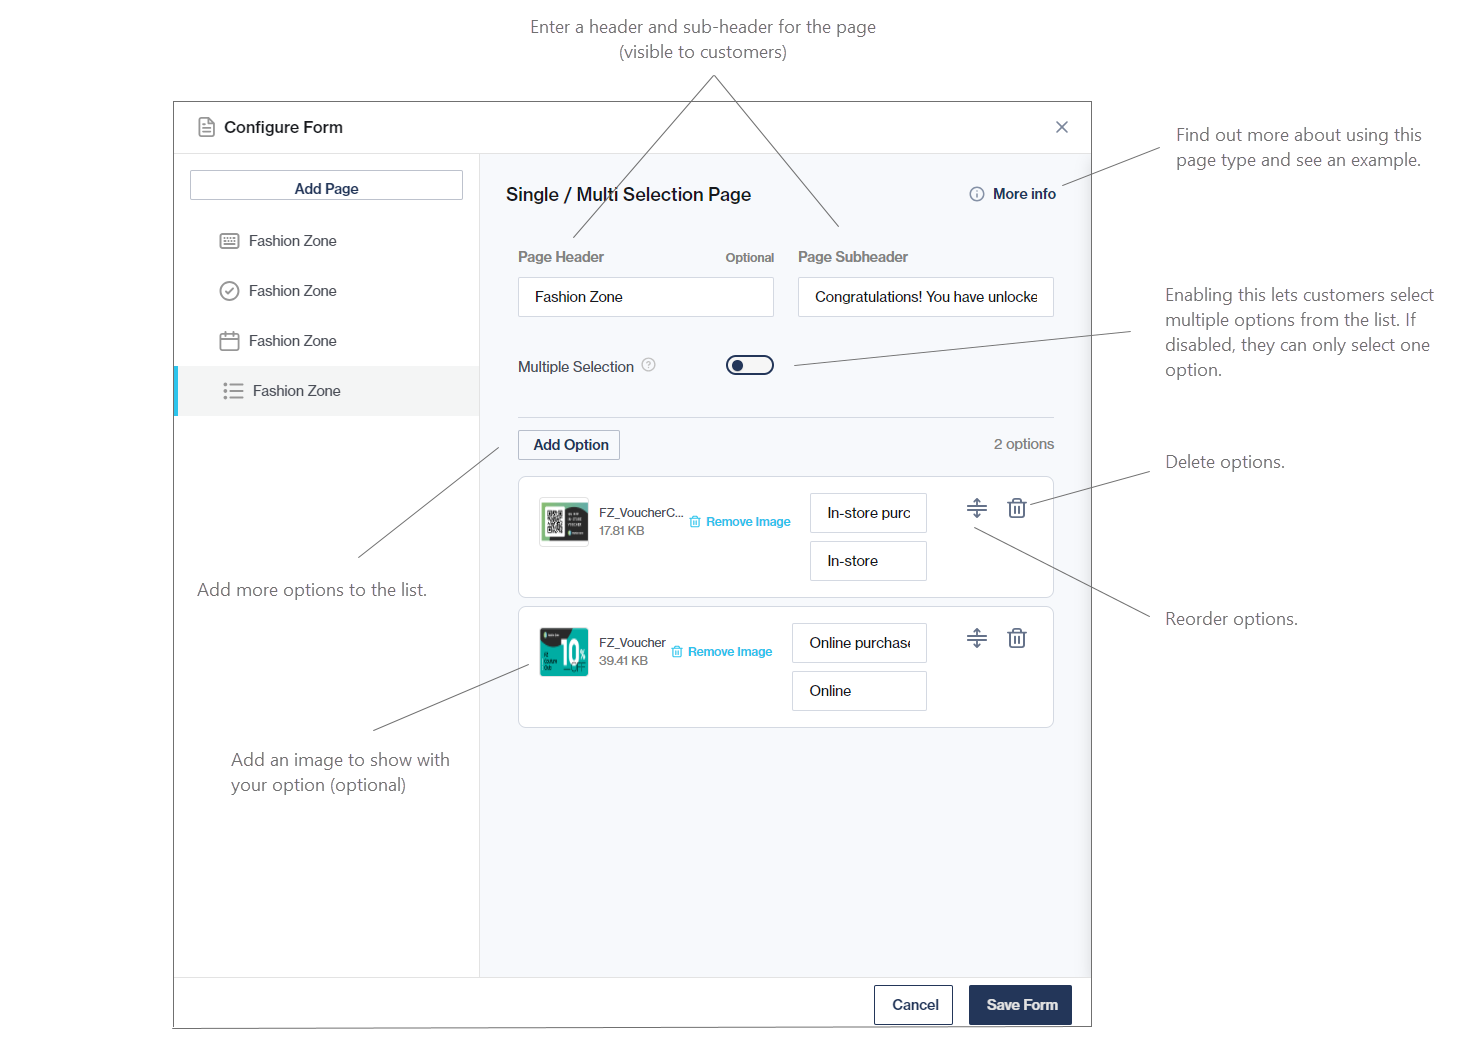
Build out your form by adding pages and configuring each page.
You can add as many pages as you want, but always keep the customer's experience in mind.
Drag-and-drop the pages on the left to rearrange them.
Delete pages by hovering over the page on the left and clicking the "bin" icon.
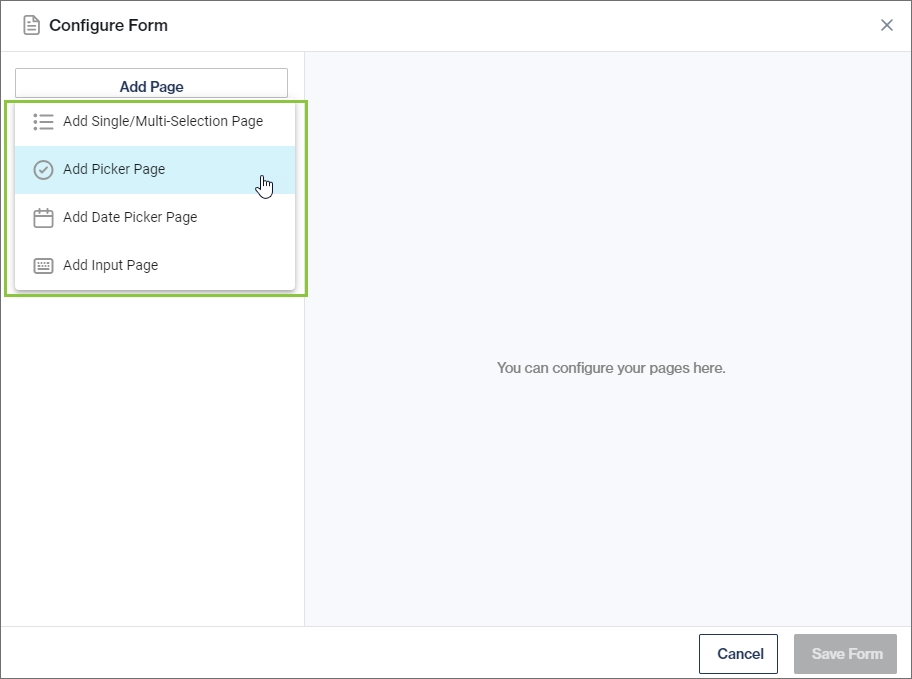
You can select from the following page types:
Click Save Form once you are happy.
When a customer reaches this node in the workflow, they have to complete the form before they can continue with the next step/flow as configured on the node above.
Add Single/Multi-Selection Page
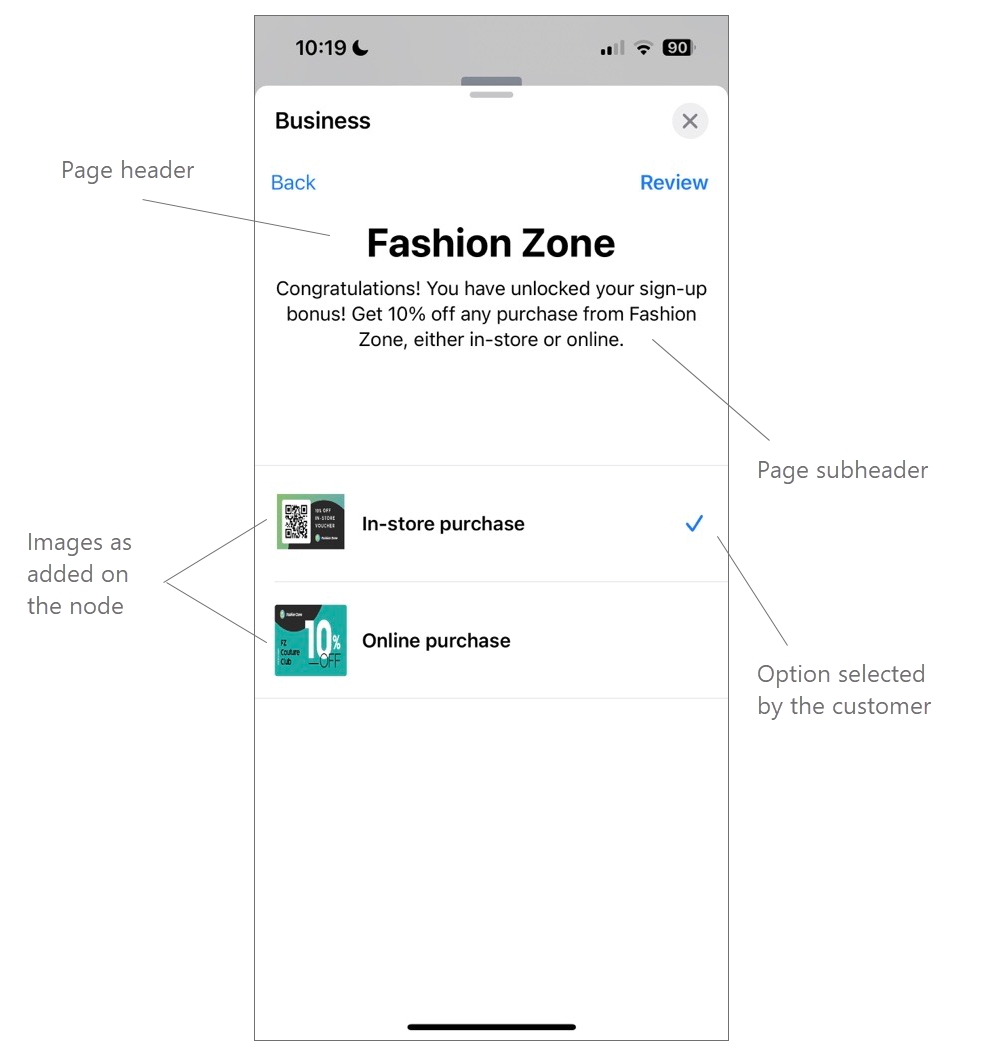
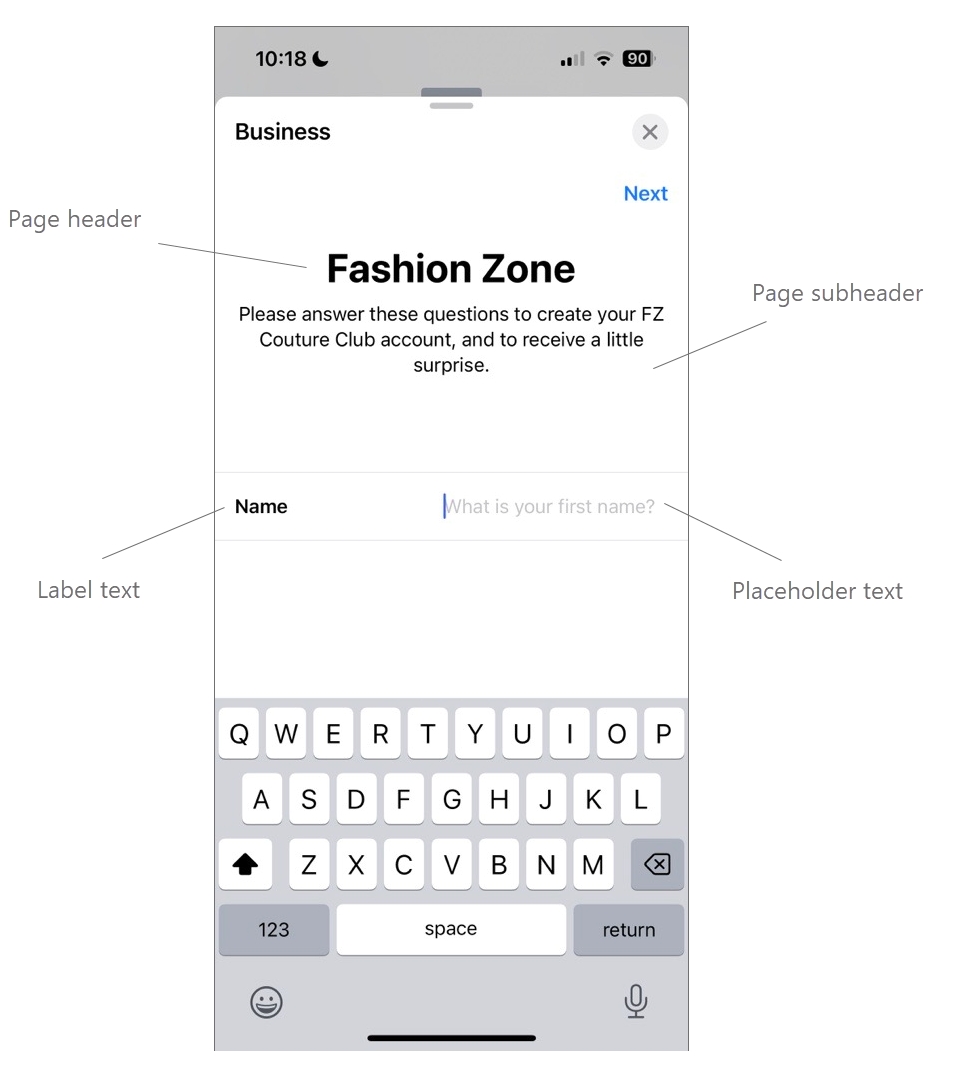
This page type allows customers to select one or more options from a list.
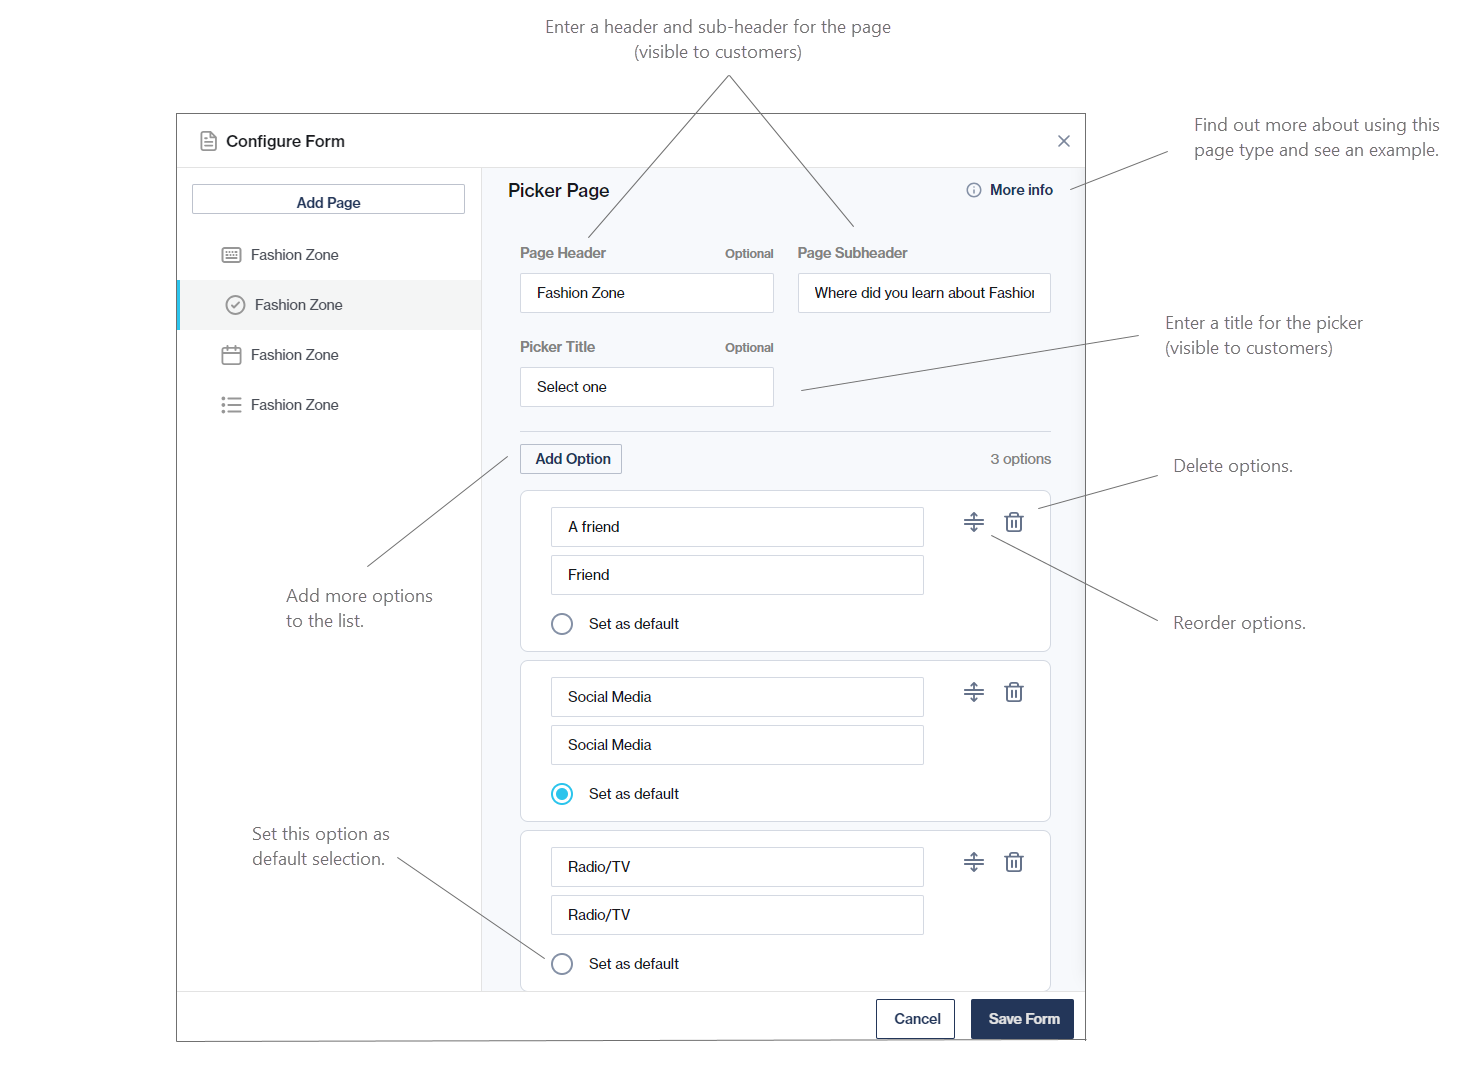
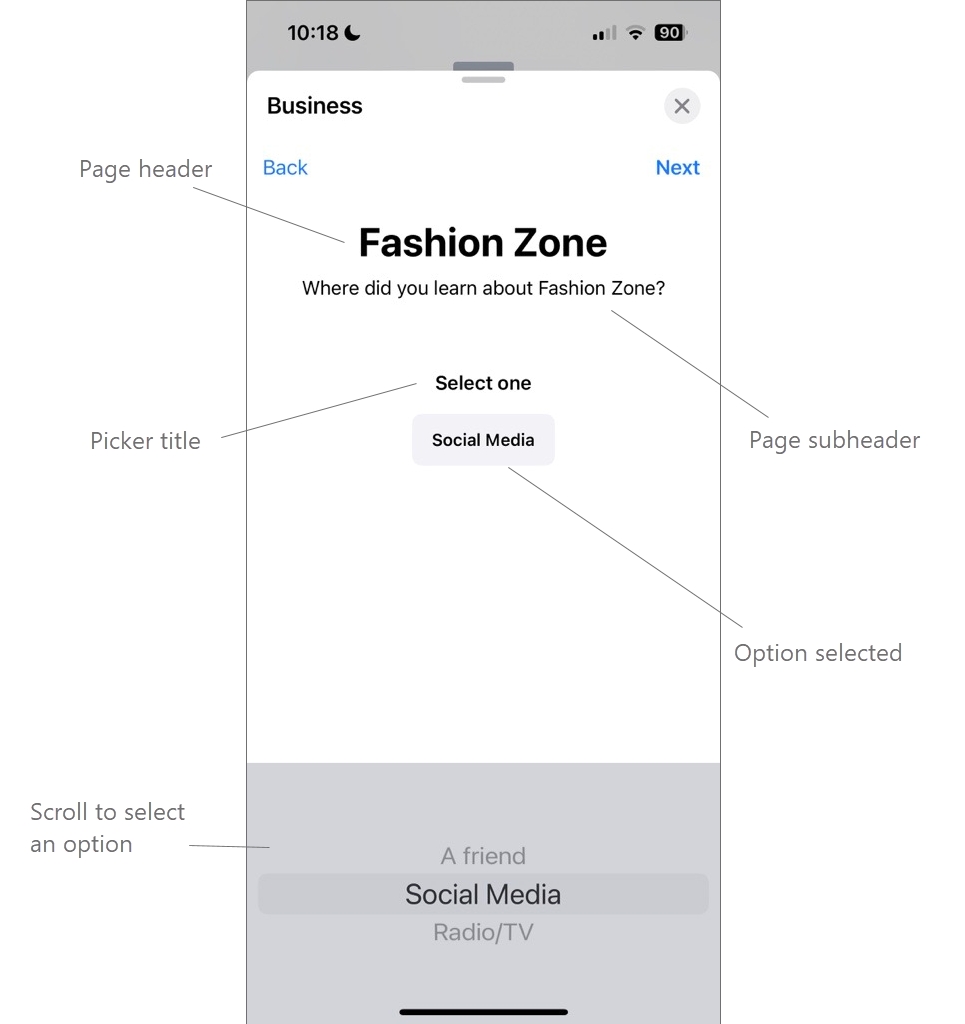
Add Picker Page
This allows customers to select one option from a scrollable pre-configured list.
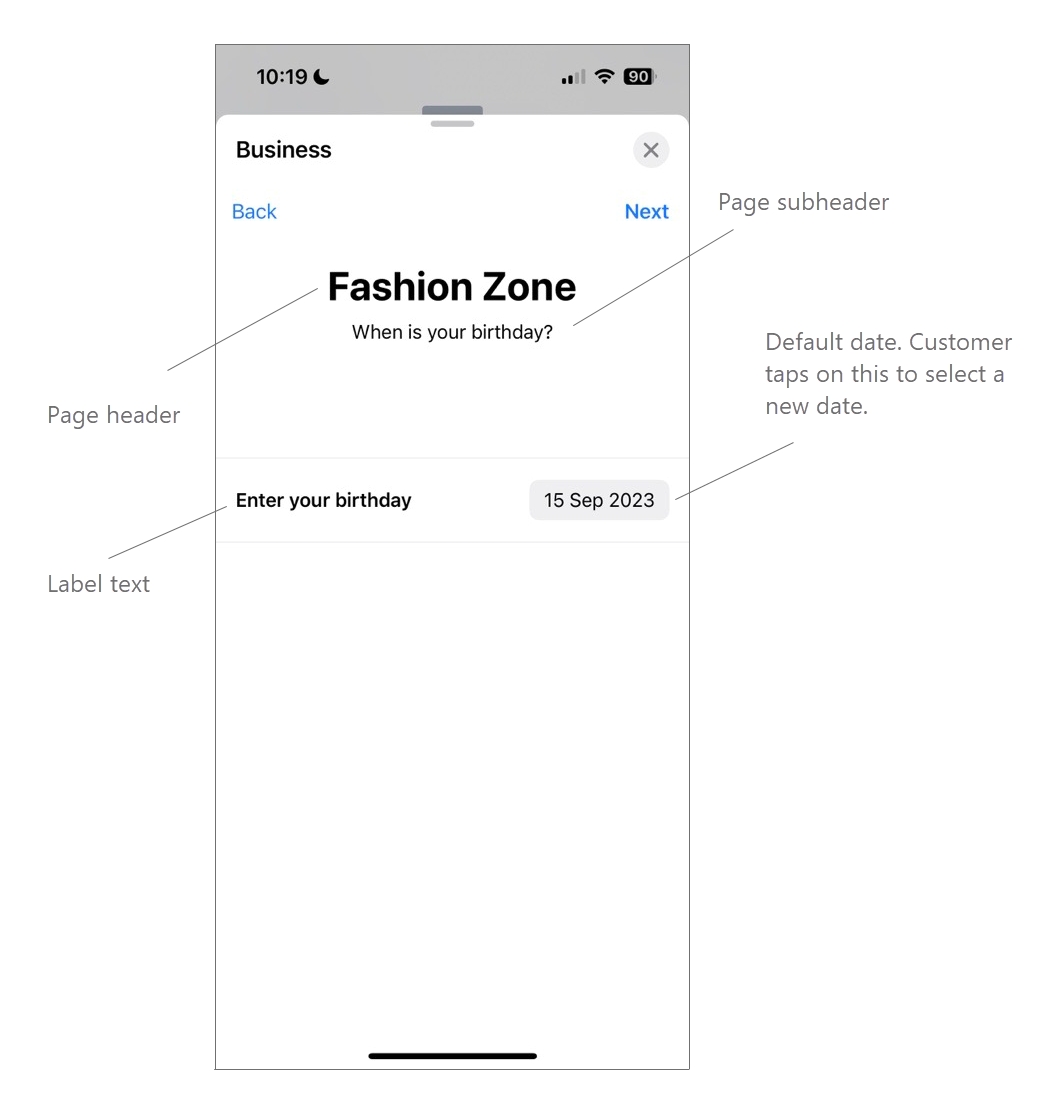
Add Date Picker Page
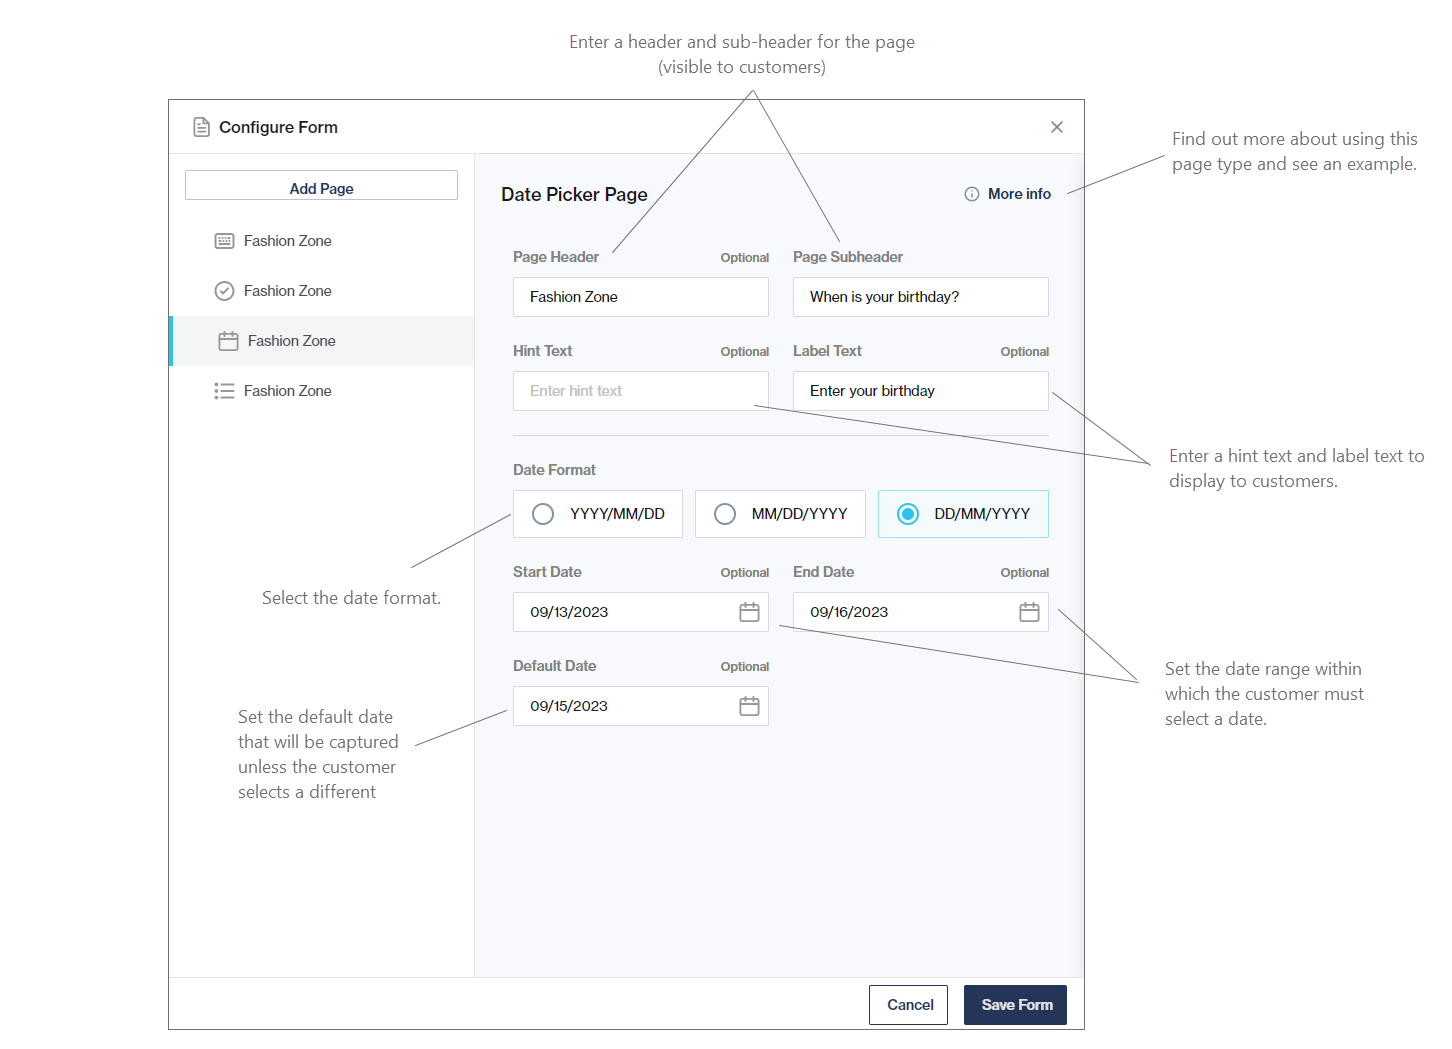
Use the Date Picker page to ask customers to select a day, month, and year within a set date range.