Send WhatsApp message templates
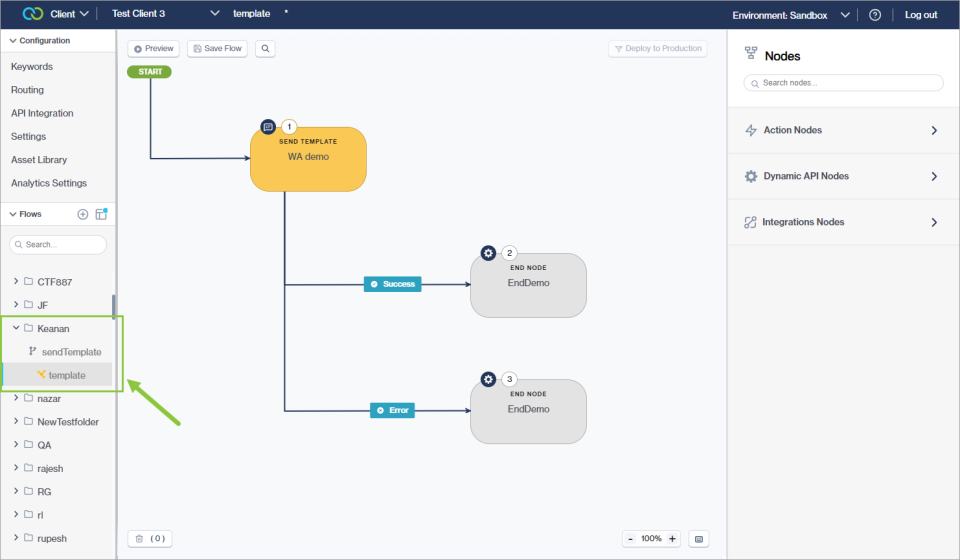
You can send WhatsApp message templates directly from Chat Flow using the Send Template node. You can use this node in any of your workflows, but it is typically used in dynamic API flows to initiate WhatsApp conversations with customers.
These WhatsApp template types are supported:
Plain text templates.
How to send WhatsApp message templates in Chat Flow
Clickatell assists you in building out a dynamic API workflow. This workflow is not user-facing and gets triggered by an incoming payload. It allows you to initiate engagement with your customers by sending a pre-approved WhatsApp template (using the Send Template node), prompting them to take action and trigger a standard workflow.
Alternative method
You can also send WhatsApp message templates using the API Integration node. This is a more technical and roundabout way of sending templates, and therefore we recommend using the method above.
These WhatsApp template types are supported:
Plain text template.
Message template configuration
To configure the API integration for message templates:
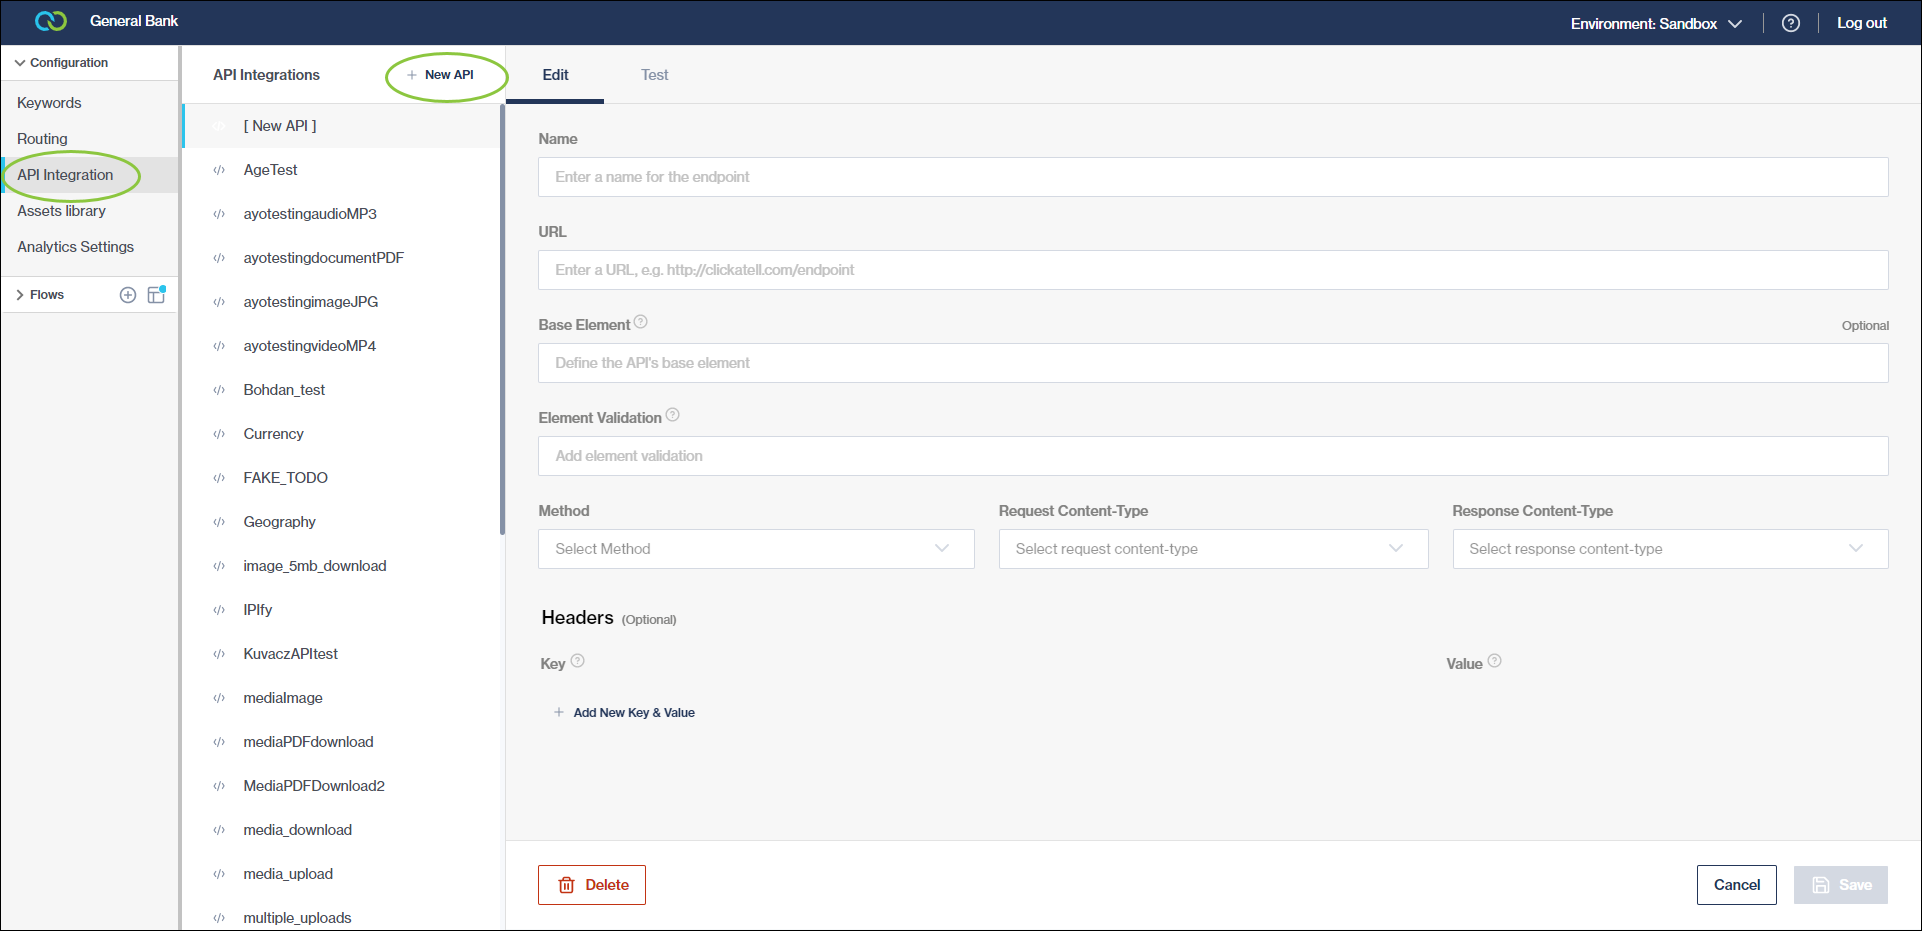
In the Configuration section of the navigation, click API Integration -> + New API.
Complete the fields to set up an API integration:
Add a Name for your endpoint.
Enter the following URL: https://platform.clickatell.com/v1/message
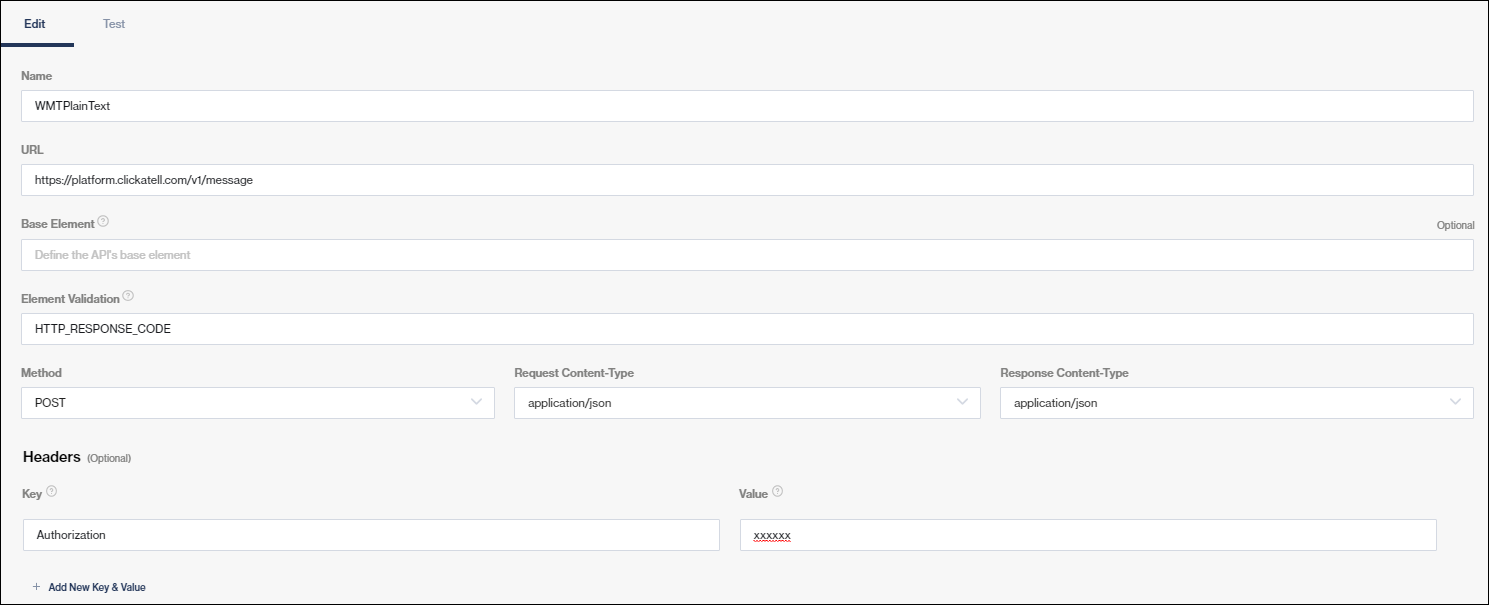
Add the Element Validation, for example: HTTP_Response_Code.
Select "POST" as the Method, and "application/json" as both the Request Content-Type and Response Content-Type.
Enter "Authorization" as the header Key (i.e., the API key for your integration that can be found by navigating to My Workspaces ->API Integrations in the Clickatell Portal), then enter the associated Value.
Save your changes.
Once configured, your API integration will be available for selection from the Name drop-down when adding an API Integration node.
API Integration node configuration
The images below show what the configuration of the API Integration node should look like for plain text and interactive templates.
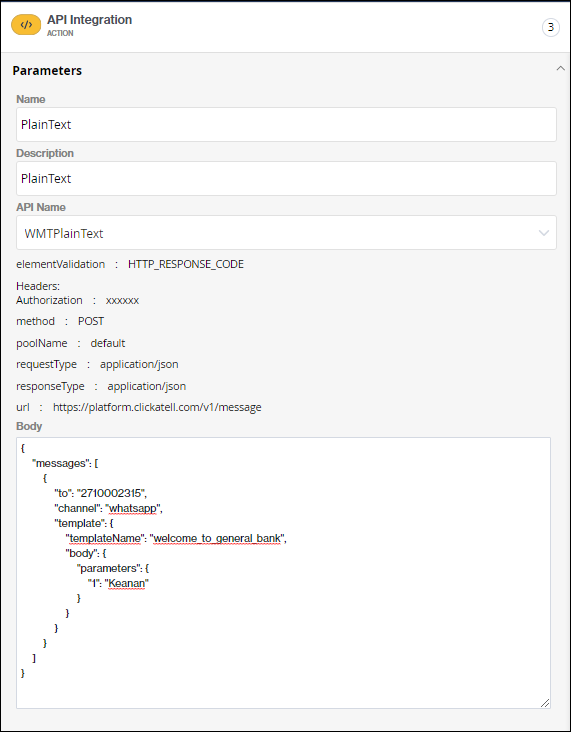
Plain text template
Plain text template body
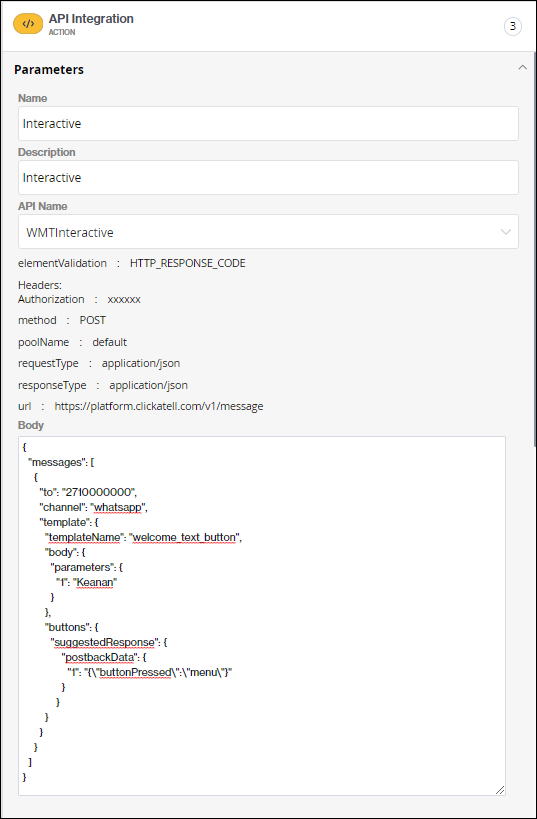
Interactive template
Interactive template body
When using interactive templates, remember to add the correct keyword in the Keywords section. The keyword must be the same as the button shown on the interactive template, e.g., "buttonPressed":"menu".
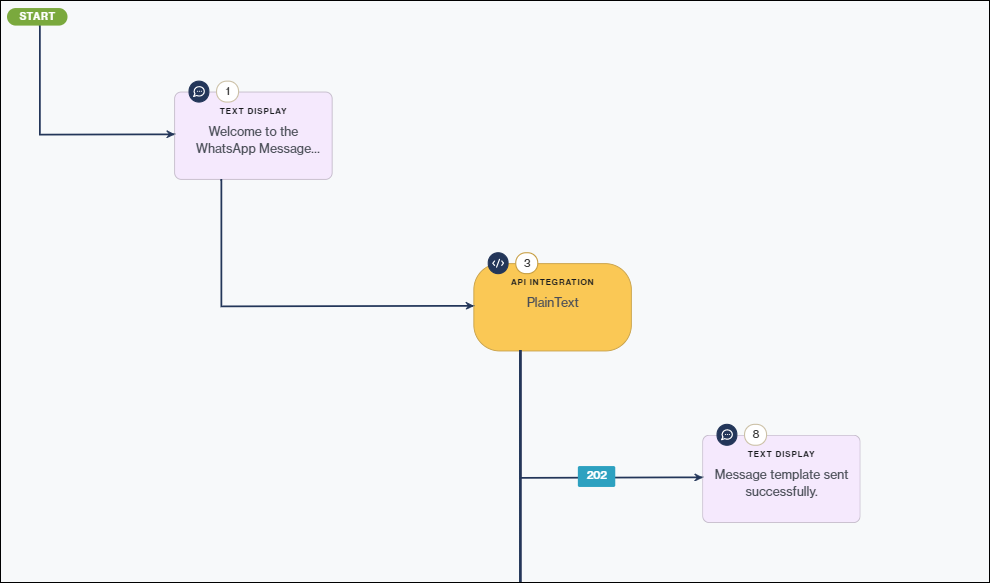
Workflow example
The example below displays a workflow in which:
The Text Display node is used to display a welcome message to the customer.
An API call is then made to send the WhatsApp message template to the customer.
In response to the call, another Text Display node is used to inform the customer that the template was sent successfully.