Media
Use the Media node to send or receive media files supported by the channels you have set up in Chat Flow.
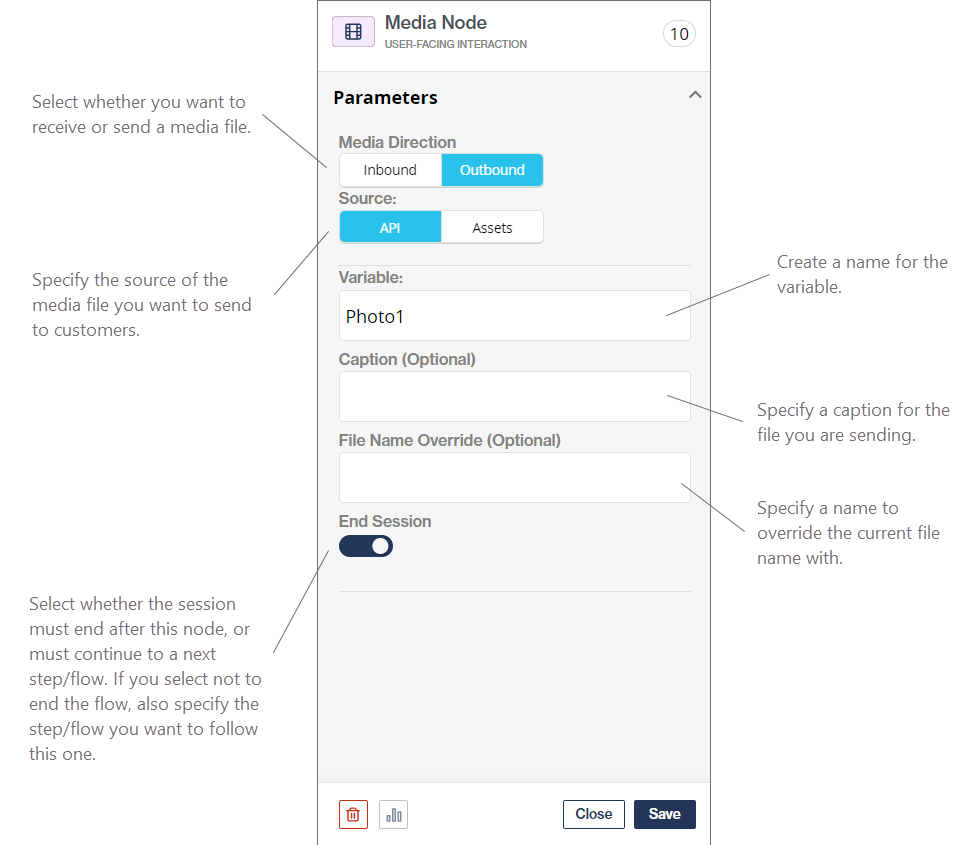
Inbound media
When selecting the inbound media direction, you are receiving a media file from your customer.
You have to add a Media node for each media file you want to receive from your customers.
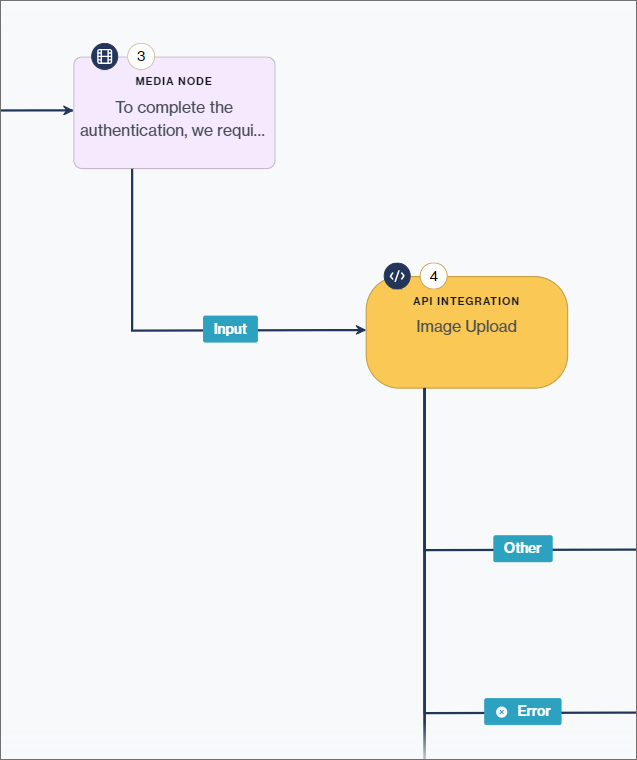
Once received, you need a mechanism to upload these files onto your own system. Each Media node must be followed by an API Integration node utilizing an API integration to upload the file to your system/database once received from the customer.
IMPORTANT: The request content type for this API integration must be set to multipart/form-data. The response type can be application/json, but is dependent on your API.
Example 1:
You want the customer to send you one media file.
Add one Media node to your flow followed by one API Integration node.
Example 2:
You want the customer to send you three media files.
Add three Media nodes to your flow, each one followed by an API Integration node (i.e., three API Integration nodes in total).
Flow construct for Example 2:
Media node --> API Integration node --> Media node --> API Integration node --> Media node --> API Integration node
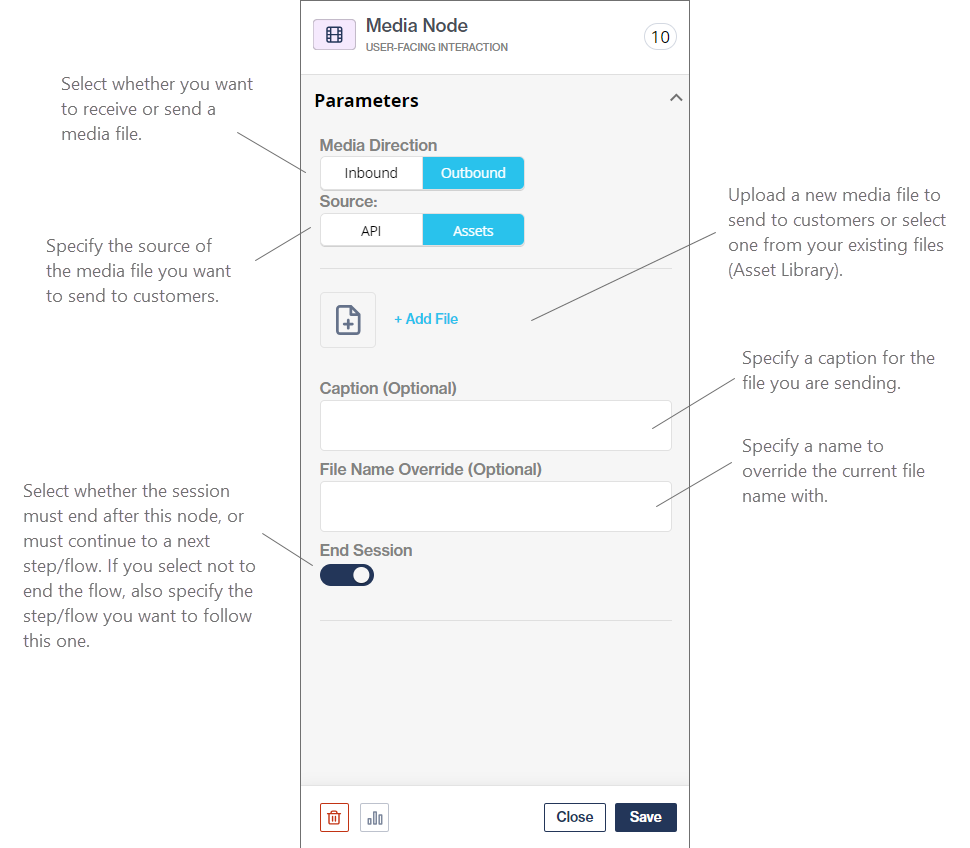
Outbound media
When selecting the outbound media direction, you are sending a media file to your customers.
You can select to:
Use an API integration to download the file you want to send to your customers from your system/database; or
Upload an asset/use an existing asset to send to your customer
You have the option to either:
End the session after sending the media file to the customer; or
Continue the flow after sending a media file to the customer and specify the next step/flow to automatically follow. The workflow can immediately continue to the next step without requiring input from the customer first.
API Integration
Selecting this option requires you to download the media file from your system first before sending it to your customers.
The request content type for this API integration may be set to application/json or multipart/form-data.
You need to add a Media node for each outbound media file you want to send to your customer. Each Media node must be preceded by an API Integration node utilizing an API integration to download the file from your system/database before it can be sent to the customer.
Example 1:
You want to send one media file to the customer.
Add one API Integration node to your flow followed by one Media node.
Example 2:
You want the customer to send you three media files.
Add three API Integration nodes to your flow, each one followed by a Media node (i.e., three Media nodes in total).
Flow construct for Example 2:
API Integration node --> Media node --> API Integration node --> Media node --> API Integration node --> Media node
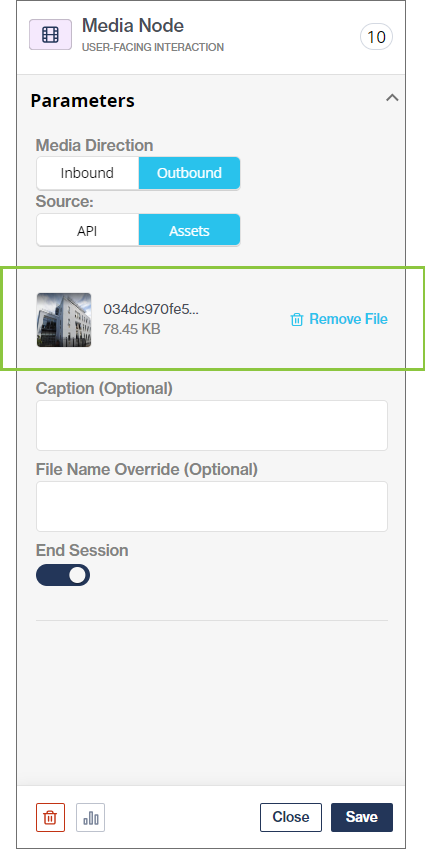
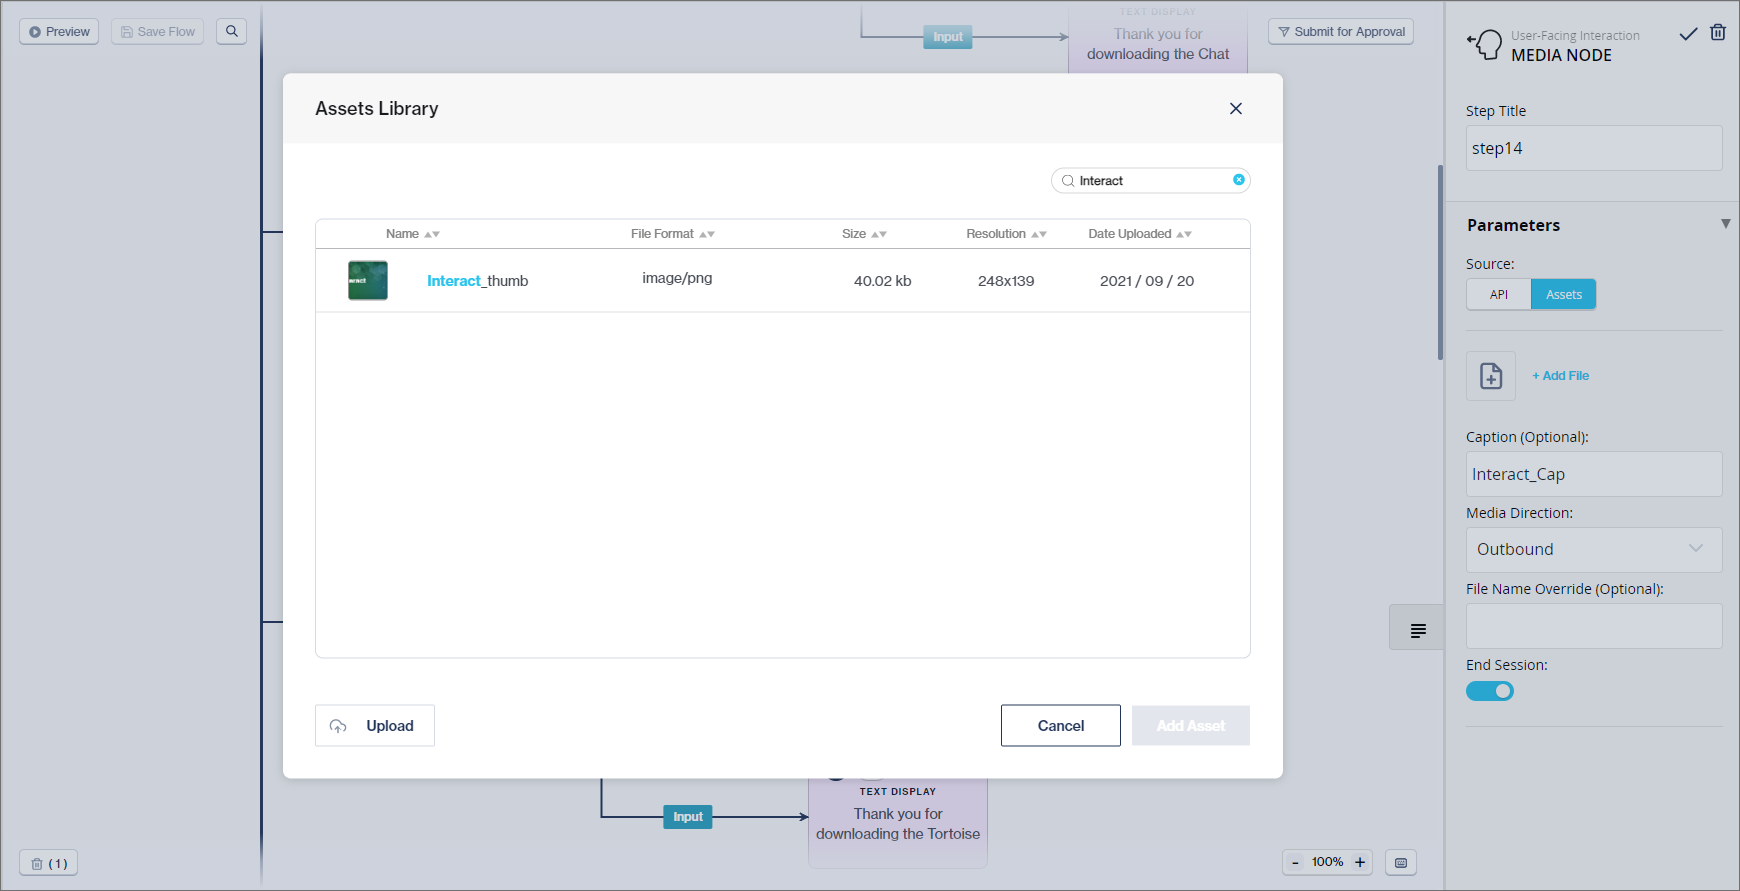
Assets
Selecting this option opens another call to action, + Add file. Clicking this opens a pop-up modal where the flow-builder can add new media files, or select from previously uploaded ones. After selecting +Add File on the node, you can upload a new media file or select from existing ones.
A thumbnail of the selected media file appears on the node:
View in the canvas:
Supported media formats and sizes
The file types supported by this node have format and size limitations. The table below indicates the supported formats and their size limits.
| File Type | Supported Formats | File Size Limit |
|---|---|---|
Documents | pdf, doc, docx, xls, xlsx, ppt, pptx | 20MB |
Images | jpeg, jpg, png, udsz | 5MB |
Audio files | aac, amr, mp4, mp3, opus | 16MB |
Video files | mp4 | 5MB |
Captions are only applicable for image and video types.
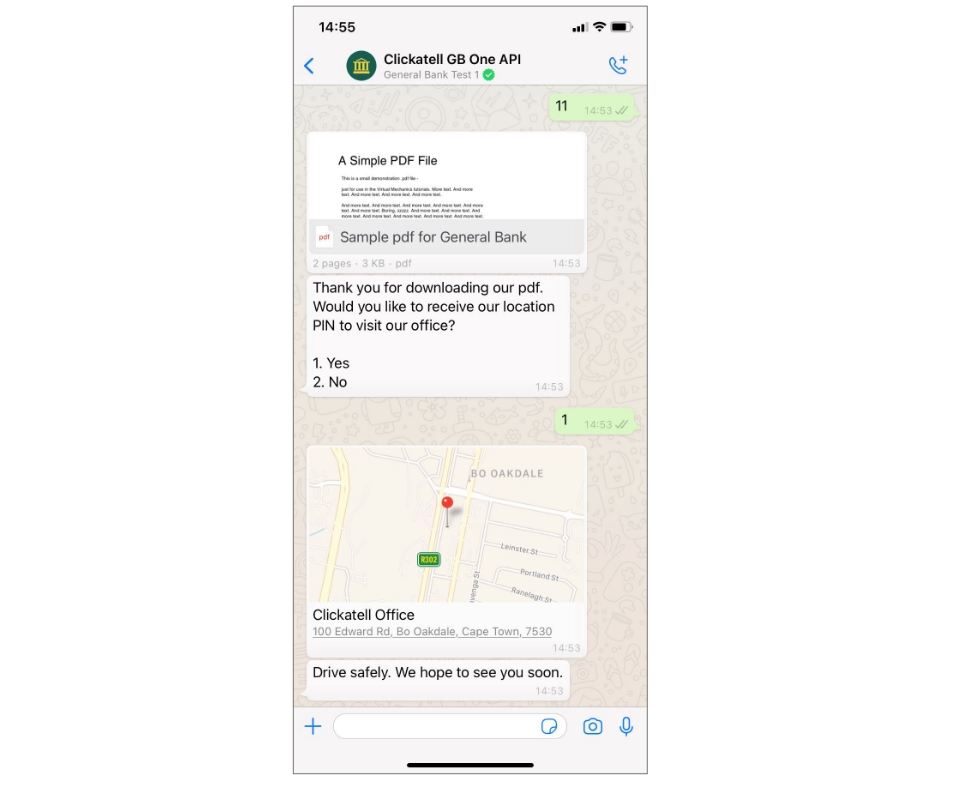
For any document type, the handset will display the original filename (and not the caption) when you download the document onto your handset.
Audio files: no caption or filename is displayed on the handset.
Last updated